
Wood burning can be done on other surfaces, for example, leather. In fact, leather burning is a very popular way to personalize present and clothing items. And since this is an artistic expression, you can explore your creativity and try different techniques and designs. Today we are presenting everything you need to learn how to burn the leather.
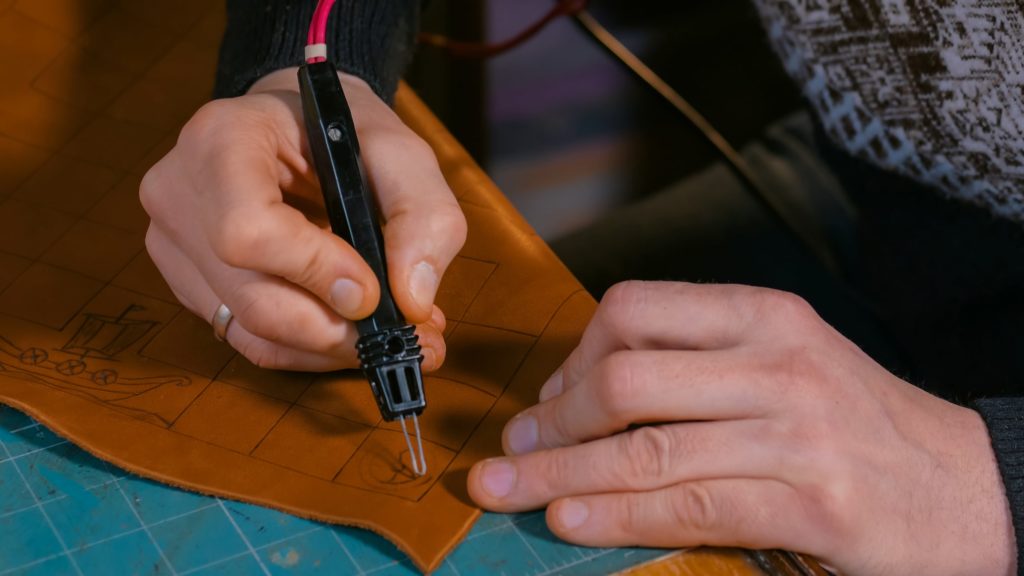
The principle of leather burning is very similar to what we already know from wood burning. Basically, we can create drawings, writings, and patterns on a piece of leather using a leather burning tool, which can be a pyrography pen. The tip of this tool gets really hot which allows us to create designs on the leather.
Contrary to wood, leather will burn much faster, meaning we either have to work at a faster pace or we can also adjust the temperature of our leather burning tool to a lower setting. This will avoid darker patches and irregular burning.
If you’re starting experimenting with leather burning you want to continue reading!
Wood burning leather for beginners
Pyrography on leather can be a fun and exciting hobby. While similar to wood burning, burning leather has some particularities that you should know before getting your leather burning tool hot.
We have already mentioned that leather burns faster than wood, so adjusting the temperature settings of your pen is imperative. Once you start working, you also need to adjust your pace in order to make the lines and details you want.
Leather, same as wood, needs to be prepared before you start working. The correct procedure will ensure that your lines are burnt clean and the leather doesn’t stain. It will also help create more detailed patterns and will help you work at ease.
While the tools are basically the same for wood burning on leather, we will recommend certain tips that are more adapted to burning leather.
Finally, we will talk about the best designs to burn on leather and a few safety measures that everyone should keep in mind while working with tools that heat up and burn.
Prepare the leather
- Wet the leather
- Let the leather absorb part of the water
- Smoothen the leather in different directions
- Let the leather dry completely
Preparing the piece of leather you want to burn is very important. It will guarantee better work with your leather burning tool and will allow you to create more intricate details on the material.
When we have the leather in front of us, we can easily distinguish the skin side from the flesh side. Their textures are completely different. While the first one is smooth, the other one is rough and very textured. Leather burning is always done on the skin side of the piece of leather.
When we have chosen the piece of leather we want to work on, we can start by wetting it either with a spray or a sponge. Do not submerge the leather in water, but make sure it gets thoroughly wet.
Next, we are going to leave it for a little time to make sure the leather absorbs most of the water.
For the following step, you will need a glass or a soft piece of wood. With it, you will apply pressure to leather in different directions. This will smoothen the skin side of the piece and make it more flexible. If you notice the leather getting to dry you can add some more water.
Once you’ve worked the leather in different directions, it’s time to let it dry. You can prepare your leather the day before you need it, as to leave it dry all night.
The same process can be done on the flesh side of the leather. This could be useful if you’re creating an object like a wallet. If it is not relevant for your project the back of the piece of leather you’re working on, then don’t worry about treating this side. However, remember that this process can only be done before you start burning the leather.
Tools for leather burning
Many have asked us can you use a wood burning tool on leather. The answer is yes! You can definitely use your wood burning tool on leather. Still, there are some differences in how you are going to work on the leather. So, here you have some tips that can help you with transitioning from one surface to another.
Choose your tips wisely. Practice before you start. Keep some extra tips on hand and change them often.
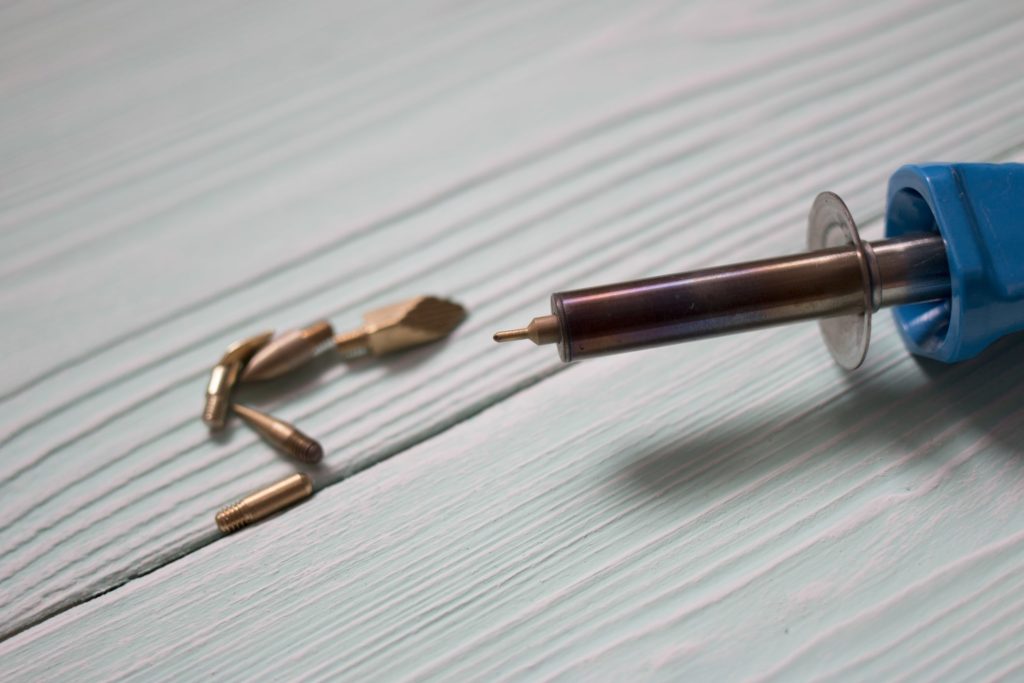
Leather burning will produce a residue that may block your tip wither ruining it or affecting the strokes you’re trying to do.
Practicing on a spare piece of leather is important in order to have a feeling of what each tip can do, the pressure you have to apply, and the speed you should work at.
Burning on leather will require a very low temperature, though to achieve certain details and shading you may want to turn it up a bit and work it in a medium setting. Avoid working at a very hot temperature since it will char your work and the smell of burning leather is not pleasant.
Designs for leather burning
You can use any designs you want for leather burning.
If you’re a beginner, you may want to go for simpler designs with clear lines and not many details. Once you get experience, you can start trying small details and shading. Practicing is the key here, the more you work on the leather, the more you will be able to do.
Safety measures when wood burning on leather
When working with a leather burning tool you need to keep in mind that it gets really hot and you want to avoid the risk of getting burnt.
So, the main thing you should always do is pose your pen in the pen holder that comes with it. This is usually a metal structure that allows you to gently position the pen in a way that the tip doesn’t touch the table and you can grab it comfortably to continue working. Do not leave your leather burning tool on the table, and never leave it unsupervised when it’s hot.
Remember that to clean or change the tips you need to wait till the pen is completely cool. Otherwise, you risk breaking the tip and having it stuck in the wood burning tool.
Finally, we would recommend working in a ventilated room and always try to avoid inhaling the smoke from the burning.


